
Get Started with Arduino: A Step-by-Step Guide to Building Electronics Projects
Arduino is an open-source electronics platform based on easy-to-use hardware and software. It is designed for individuals with little or no programming and electronics experience to build interactive electronic projects.
The Arduino platform consists of a range of hardware boards, a software development environment (IDE), and a community of developers. The hardware boards are small computers with a microcontroller, which is a central processing unit (CPU) that can be programmed to interact with the physical world through input and output (I/O) pins. The boards are equipped with a variety of sensors and actuators that can be used to build a wide range of projects, such as remote controls, robots, and home automation systems.
The Arduino software development environment (IDE) is a free, cross-platform application that enables users to write, upload, and debug code for the Arduino boards. The Arduino language is based on C++, and it includes a set of libraries that make it easy to interact with the hardware and perform common tasks, such as reading data from sensors and controlling motors.
The Arduino community is a global network of makers, artists, educators, and enthusiasts who share their knowledge and experience with the platform. The community offers a range of resources, including project ideas, tutorials, and forums for discussing and troubleshooting projects.
One of the key advantages of Arduino is its simplicity and versatility. The hardware and software are designed to be easy to use, and the platform supports a wide range of projects and applications. This makes Arduino an excellent choice for beginners who are looking to learn about electronics and programming, as well as for experienced makers who want to build more advanced projects.
In conclusion, Arduino is a powerful and flexible platform that enables individuals to build interactive electronic projects, regardless of their programming and electronics experience. Its simplicity, versatility, and strong community support make it an ideal choice for makers of all levels.
What is Arduino Language and IDE
The programming language of Arduino is a variant of C++. Arduino uses a modified version of C++ that includes a set of libraries specifically designed for interacting with the hardware on the Arduino board. These libraries make it easier to perform common tasks, such as reading data from sensors and controlling motors, without having to write low-level code.
The Arduino Integrated Development Environment (IDE) is a free, cross-platform application that enables users to write, upload, and debug code for the Arduino boards. The IDE includes a text editor, a compiler, and a debugger, and it supports both the Arduino language and C++. It also includes a library manager that allows users to easily install and manage libraries for their projects.

In addition to the Arduino language, the Arduino platform supports a range of other programming languages, including Python, Java, and C. These languages can be used to program the Arduino boards through the use of third-party libraries and tools.
Overall, the Arduino programming language is designed to be easy to learn and use, especially for individuals with little or no programming experience. It is well-suited for building interactive projects that involve sensors, actuators, and other types of I/O devices.
Which Arduino Board is Right for You? A Comparison of Popular Types and Their Capabilities
There are a wide range of Arduino boards available, each with its own set of features and capabilities. Some of the most popular types of Arduino boards include:
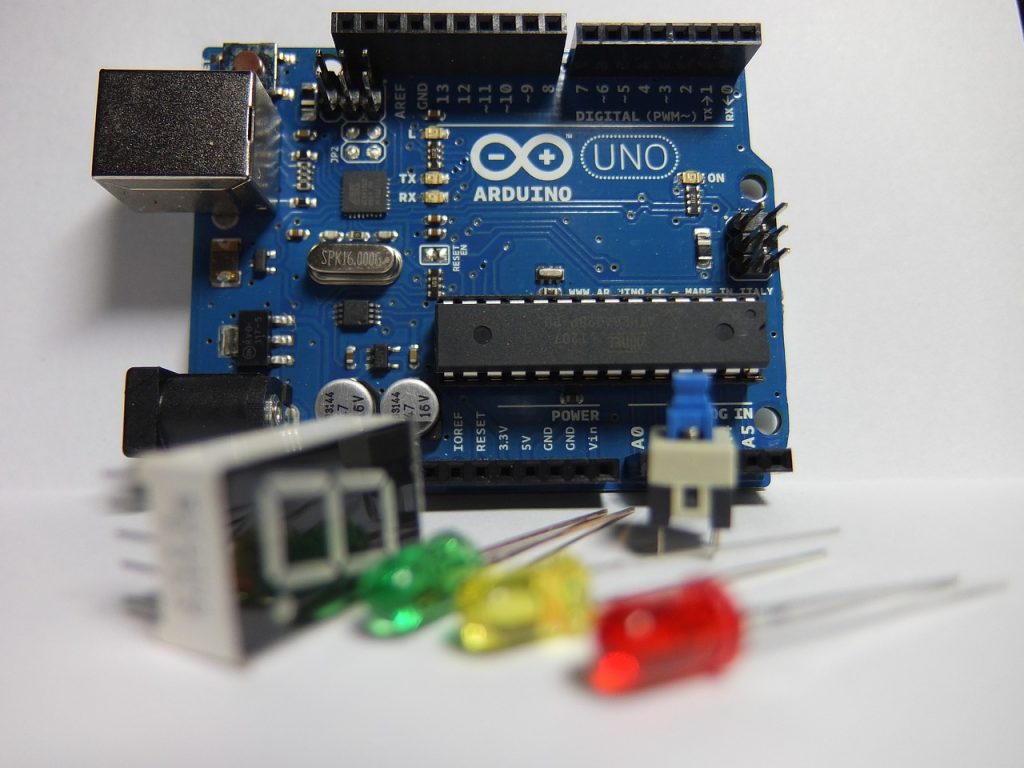
Arduino Uno
The Arduino Uno is the most widely used and recognized board in the Arduino family. It is based on the ATmega328 microcontroller and has 14 digital input/output (I/O) pins, 6 analog input pins, a USB connection, a power jack, and a reset button. The Uno is suitable for a wide range of projects, including simple robotics, home automation, and sensor networks.
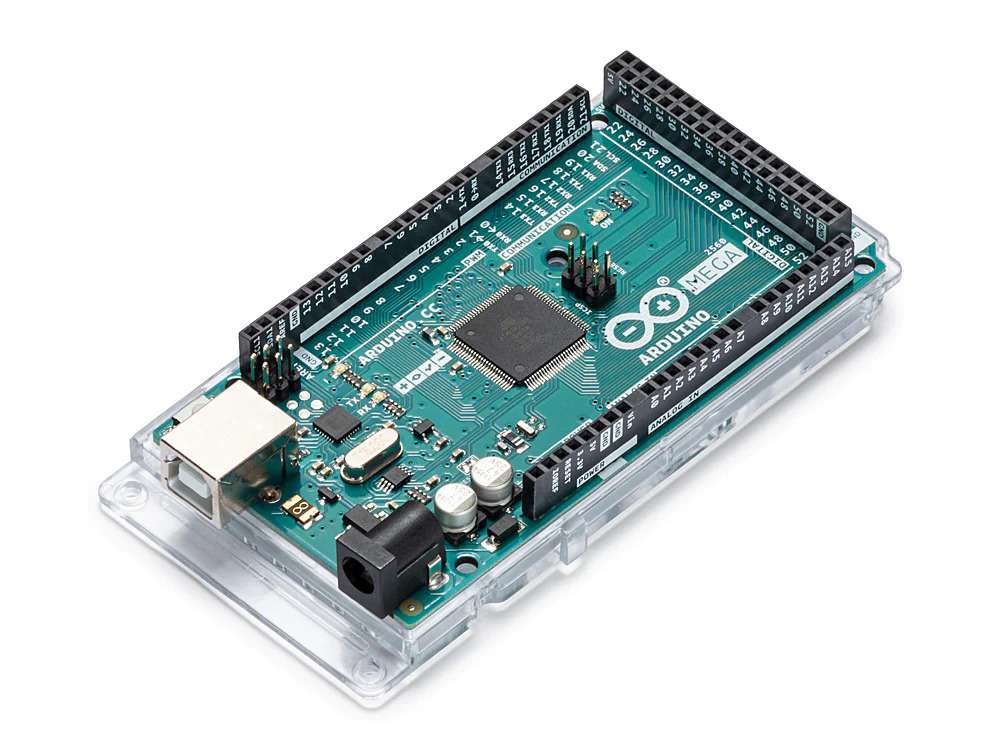
Arduino Mega
Arduino Mega: The Arduino Mega is a larger version of the Uno, with more I/O pins, more memory, and more processing power. It is based on the ATmega2560 microcontroller and has 54 digital I/O pins, 16 analog inputs, and a USB connection. The Mega is well-suited for projects that require a lot of I/O or processing power, such as complex robotics or data logging systems.
Arduino Nano

Arduino Nano: The Arduino Nano is a small, breadboard-friendly board based on the ATmega328 microcontroller. It has the same I/O and processing capabilities as the Uno, but it is much smaller and more compact. The Nano is ideal for projects that require a compact, low-power solution, such as wearable devices or portable sensors.
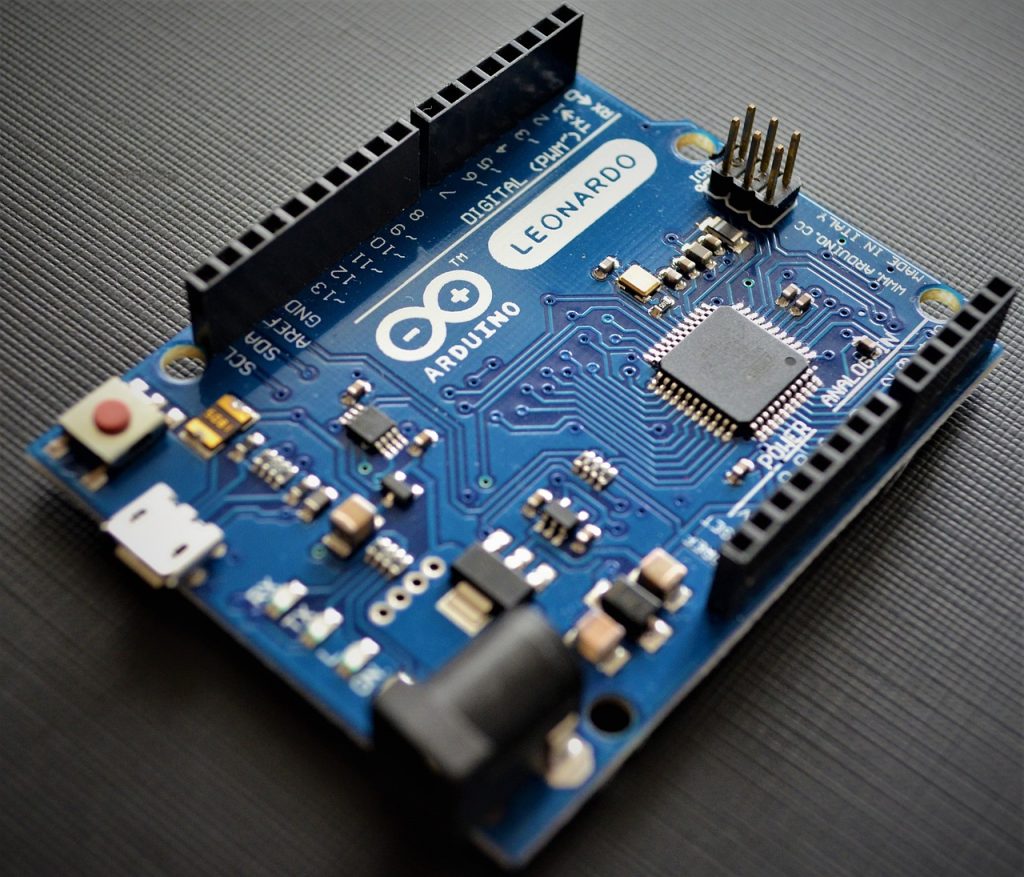
Arduino Leonardo
Arduino Leonardo: The Arduino Leonardo is a microcontroller board based on the ATmega32u4. It has 20 digital I/O pins, 7 analog inputs, a USB connection, and a micro USB port. The Leonardo is unique because it can act as a USB keyboard or mouse, making it ideal for projects that involve human-computer interaction.

Arduino Due
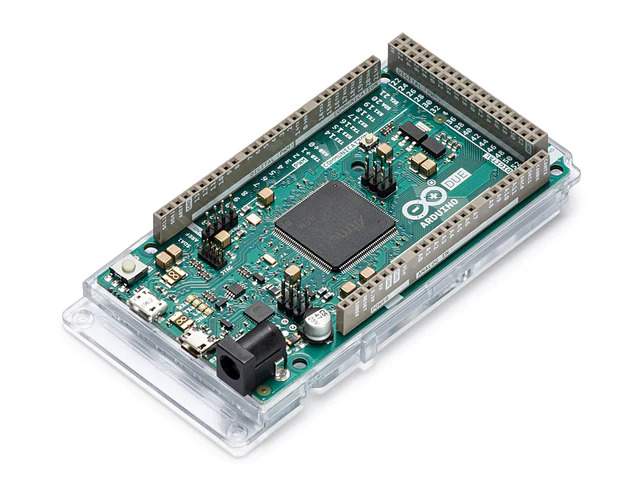
Arduino Due: The Arduino Due is a powerful board based on the Atmel SAM3X8E ARM Cortex-M3 microcontroller. It has 54 digital I/O pins, 12 analog inputs, and a USB connection. The Due is the first Arduino board to feature a 32-bit microcontroller, which makes it well-suited for high-performance applications, such as real-time data processing or motor control.
Overall, the different types of Arduino boards are designed to meet the needs of a wide range of projects and applications. Each board has its own unique set of features and capabilities, and users can choose the board that best meets their needs.
Learn to Program Arduino with a Basic LED Blink Sketch
Here is a simple Arduino program that blinks an LED connected to digital pin 13 on an Arduino Uno board
And here is a circuit diagram for this program:
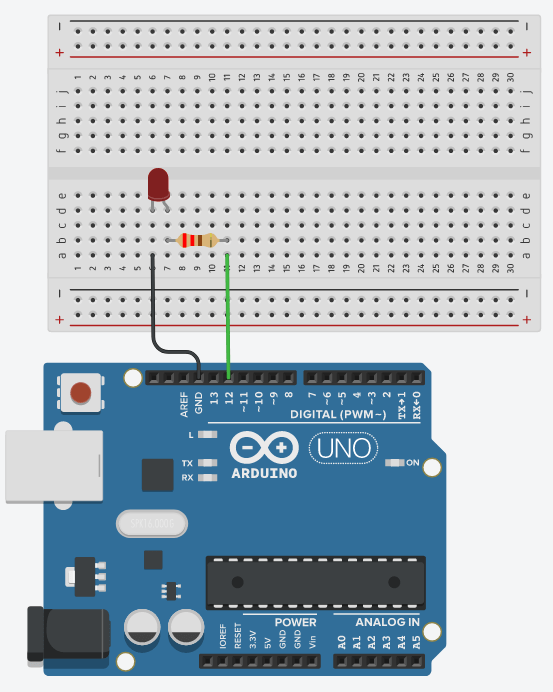
Arduino program that blinks an LED
// Set the LED pin as an output
int ledPin = 13;
void setup() {
  pinMode(ledPin, OUTPUT);
}

void loop() {
  // Turn the LED on
  digitalWrite(ledPin, HIGH);
  // Wait for one second
  delay(1000);
  // Turn the LED off
  digitalWrite(ledPin, LOW);
  // Wait for one second
  delay(1000);
}
To use this program, connect an LED to digital pin 13 on the Arduino Uno board, as shown in the circuit diagram. Then, upload the program to the board using the Arduino IDE. The LED should blink on and off at a rate of one second intervals.
This is a very basic program that demonstrates the basic structure of an Arduino sketch, as well as how to control an LED using the digitalWrite() function. With a little bit of knowledge and creativity, you can build much more complex and interesting projects using the Arduino platform.